| Table of Contents |
|---|
Getting Started
GradesFirst Appointment Campaigns enable the advisor to request that specific students select a specific date and time in which to schedule an appointment instead of the advisor creating appointments for each and every student. This feature is commonly used when an advisor must meet with all of their students at least once per term. To begin, click on Campaigns tab then under Actions, click on the Appointment Campaigns under Options > Create a New Campaign link and follow the setup steps.
Step 1: Define theNew Invitation Campaign
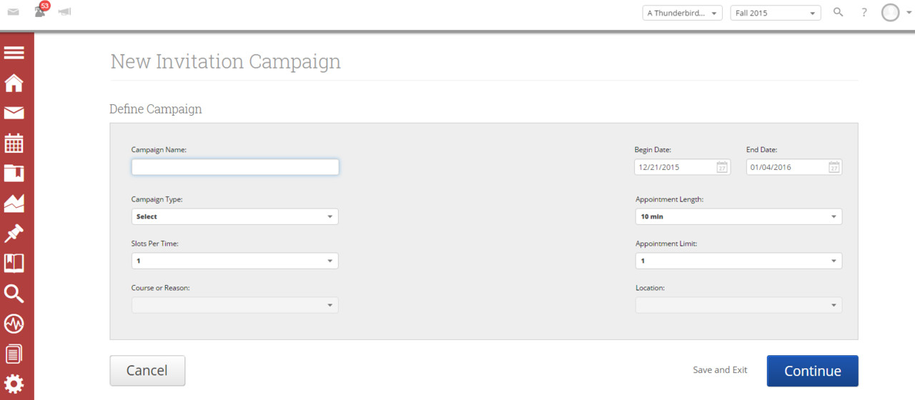
- Enter the Campaign Name of Campaign. The name of the campaign only appears to the advisor. This needs to be a name that makes sense to you regarding the type of campaign you are about to send.
- Email Subject. The topic will be the subject of the email going to the student.
- Special Instructions to Student This will be your message to the student.
- Choose the advisors for the Appointment Campaign will let you select multiple advisors if desired. For instance, if you want a student to meet with you or any other advisor, select them here.
- Choose the Start and End Date. Campaign Type. This is the type of campaign you will be creating e.g. Advising or Tutoring campaign.
- Slots Per Time. This is the number of slots per time slot in your campaign i.e. I can see 2 students for the afternoon time slot at 1 pm.
- Course or Reason. Select the course or reason for the type of campaign you are creating.
- Begin date and End date. This will be the date range for which you want the students to make schedule their appointments.
- Appointment Length of the Appointment. This is where you define exactly how long the appointment will be. Durations include 10, 15, 30, 45 and 60 minute intervals.Appointments
- Appointment Limit. This will determine is how many appointments you wish for the each student to schedule.
- Location. Select Select the location of where the appointment(s) appointments will be held.
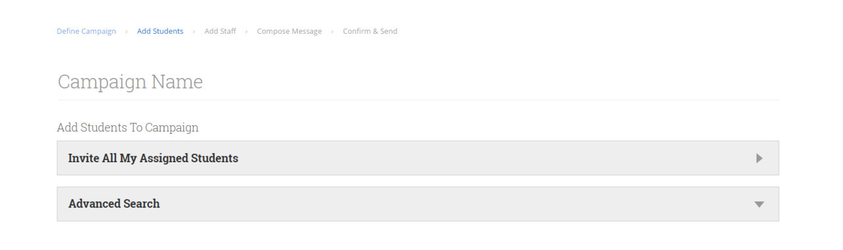
Add Students to Campaign
Once the Campaign Details are created and the selections are defined, the next step is adding recipients. Click Select Students to Invite. Here you can use the tabs to search for recipients in several ways.
You have several ways to search for and select your students.
- Search for Recipients: Provides users with advanced search filters to find, and select, students.
- Search by My Students: Search for students that are assigned to me.
- Search for Students for other Advisors: Search for students that are assigned to other advisors.
When you select students from a tab, click Add Students before moving to the next tab to add those students to your Appointment Campaign.
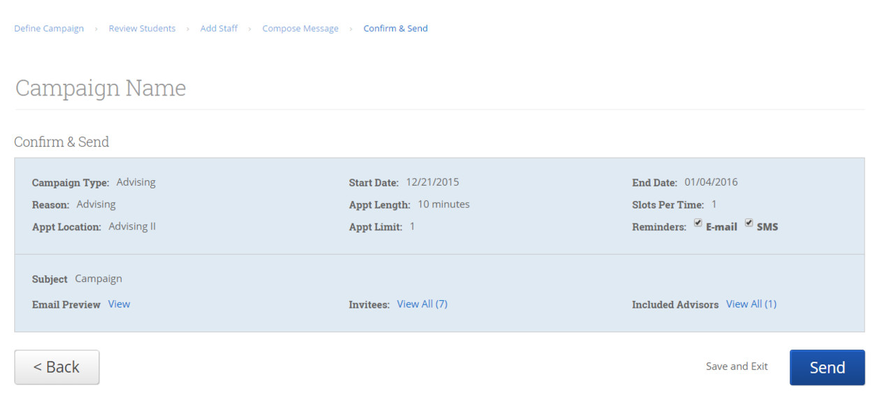
Step 3: Review Campaign Options
When you have selected all desired students, click Review Campaign Options. This is where you will be able to preview your entire campaign before sending it out.
students to the campaign. You can click Invite All My Assigned Students to add all of those assigned to you. Or, you may also use the Advanced Search options to narrow down your selections by course, major, classification and more.
For example, if you selected Invite All My Assigned Students, you would see a list of those students appear as shown below.

To remove a recipient from the list, just simply select the checkbox next to their name and click the Actions dropdown. Then, click Remove Selected Users. Once the list is complete you may proceed by clicking Continue.
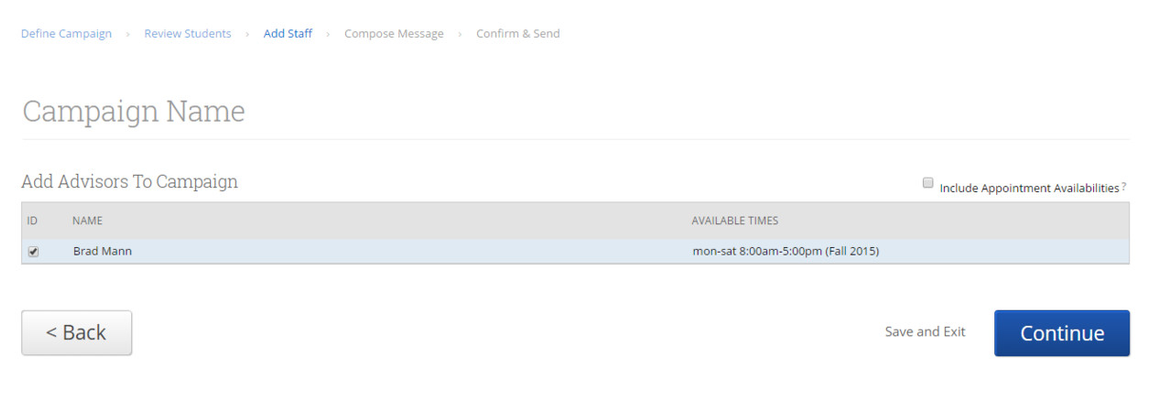
Add Advisors/Tutors To Campaign
Next we need to select the Advisors or Tutors that will be part of the campaign. You can select them by selecting the checkbox next to their name and clicking Continue. Note: Advisors or Tutors have the ability to designate availability times just for campaigns. They can set these by navigating to their profile and selecting the My Availability Tab.
For convenience, a selection box is located in the top right of the screen that allows the creator of the campaign to also Include Appointment Availabilities. This is helpful if you want to show all the available times for scheduling and not just the times for campaigns.
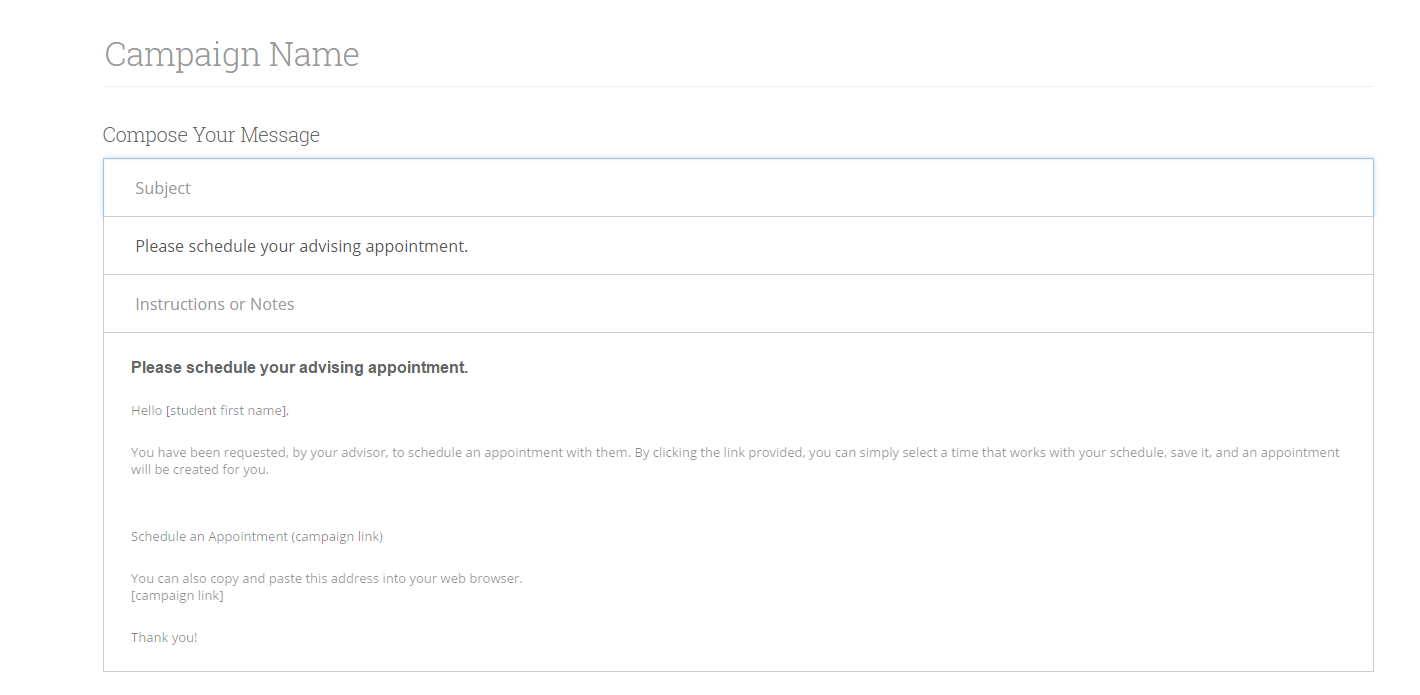
Now we need to add a Subject for the campaign.
Email Subject. The topic will be the subject of the email going to the student.
Instructions or Notes. This will be your message to the student.
An email preview will show at the bottom of the page. Once you are finished, click Continue.
Please make sure that you review your selected options before you start send the campaign. Once you click the Start CampaignSend button, emails will be sent to all your selected students. Below is an example of the email your students will receive.
Managing Your Campaign
GradesFirst gives you several tools to help manage your Appointment Campaign after you create and send it.
Appointments Made
This tab will let you see which students have made appointments. Not only can you view those students, but you can also Send a Message, Add Note, and/or Add Tag for those students.
Appointments Not Yet Made
This tab will display those students who have not yet made their appointment(s).
- Resend Appointment Request This option will let you resend the appointment campaign email to selected students. This is great, for instance, if a student accidentally deletes the original email.
Reports Created
This tab will display all advisor reports that were created for the appointments made during this campaign.
Appointment Campaign Options
- Edit Campaign Details. With this option, you can edit anything about the appointment campaign. When those changes have been saved, they will automatically apply to all students who still are required to make an appointment. Students who have already created their appointment(s) will not be affected by the changes.
- Add/Remove Recipients. This option will allow the advisor to either add or remove students for this campaign.
- Delete This Campaign. You can use this option to delete an existing campaign. However, deleting this campaign will NOT remove any student appointments that have already been scheduled.