...
Note: The button text may have been customized by your school to say something like "Make an Advising Appointment" or "Schedule at the Advising Center".
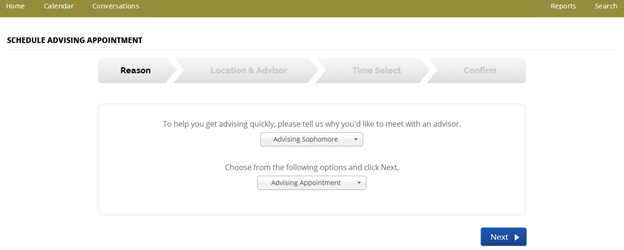
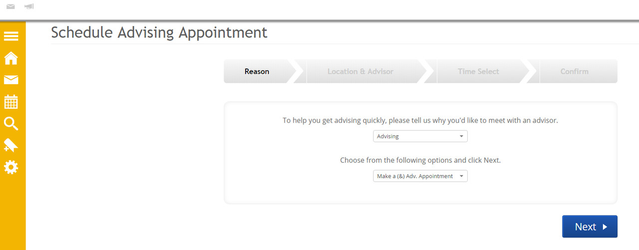
3. Select the Reason for your visit (why you'd like to meet with an advisor). Then, click Next.
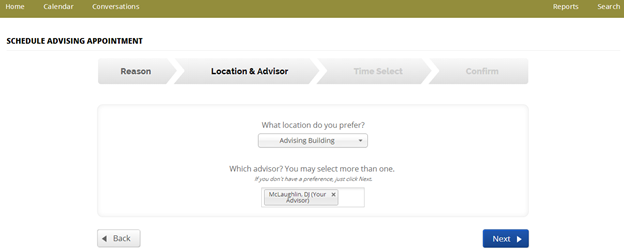
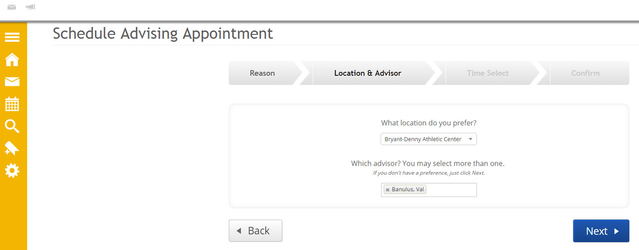
4. Optionally, you select the Location and Advisor(s) you would prefer for the appointment. You will have the option to choose your assigned advisor(s) if available or other advisors. Click Next.
Note: At any point, if you need to go back and make a change to your selections, click the Back button at bottom left.
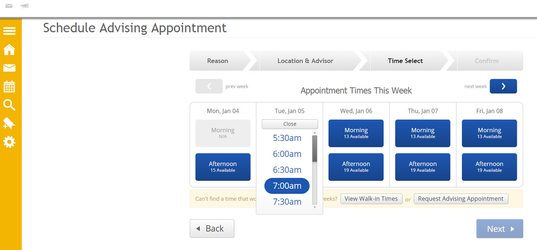
5. Select an available Morning or Afternoon.
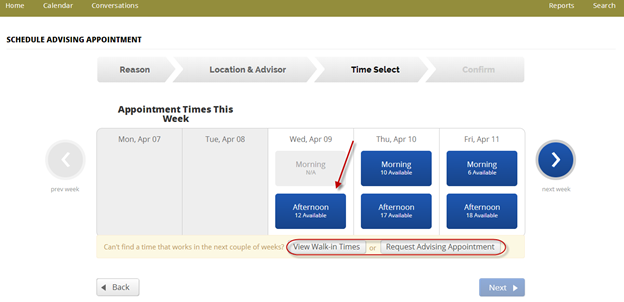
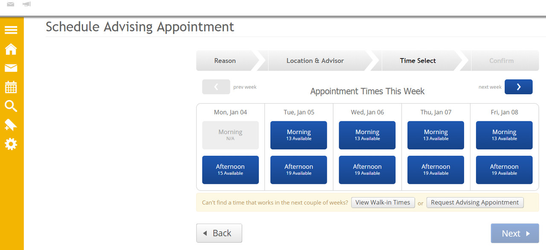
If you can't find a time that works for you, you may also have the options to View Walk-in Times or Request Advising Appointment.
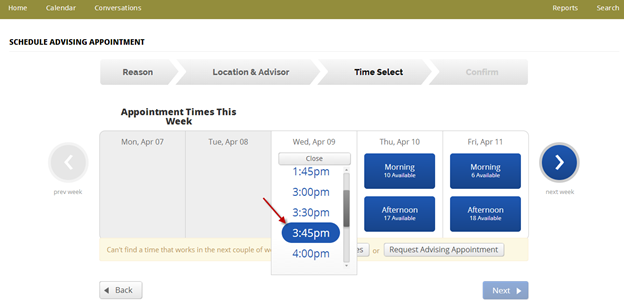
6. Select an available time. Then click Next.
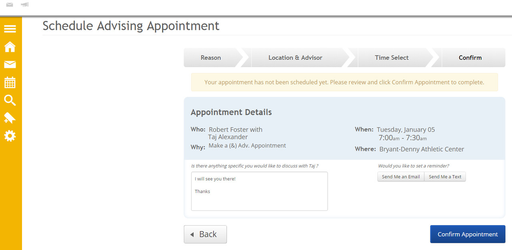
7. Please fill in comments if there is anything specific you would like to discuss with your advisor.
...
Then click the Confirm Appointment button.
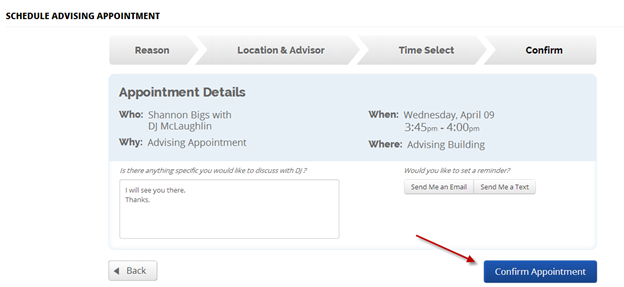
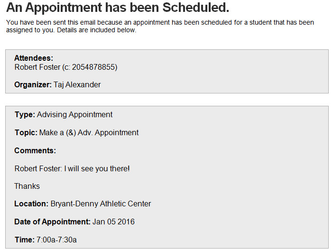
8. The system will display a confirmation screen with the details of your appointment.
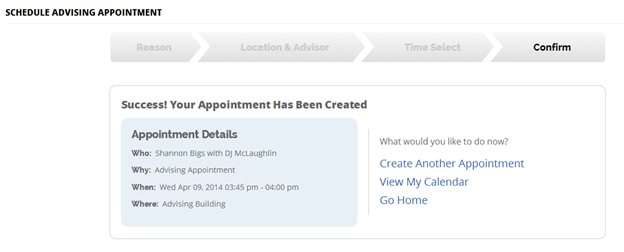
GradesFirst will send 
Once saved, users will receive an email confirmation of the appointment.