Advising Center for Advisors
- Daniel Rehner
- Joy McLaughlin (Unlicensed)
- Jade Lynn (Unlicensed)
Overview
The Advising Center tab allows advisors to monitor and maintain visits for students in their queue or other advisors' queues. To start an appointment or manage a visit, simply select a student and click the Actions arrow to open the menu.

GradesFirst tracks:
- Students who have arrived for their scheduled appointment.
- Students who are waiting to meet with them.
- Students who are waiting to meet with the first available advisor.
- Students who are waiting to meet with another advisor.
Notifications
Each advisor will need to set their notification methods of how they will be notified when a student visits the Advising Center. The settings for these notifications are selected by going to the Advisors home page and clicking the Advising Center tab. At the top of that page, the advisor can then choose to receive notifications by checking a box for: ding (audible), email or text message.
When are notifications sent
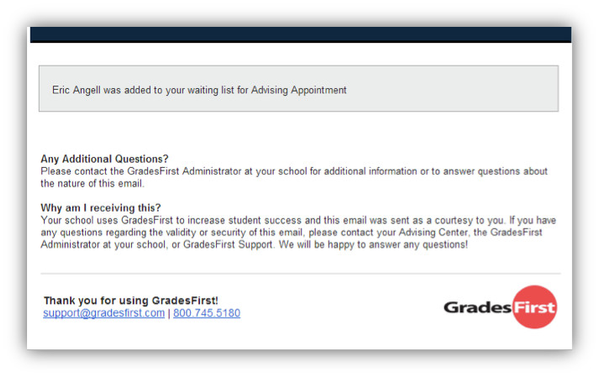
A student is added to a waiting list
Notifications are sent via ding (audible), pop up message (top right side of your screen), email and/or text message if selected. (See example below for an email notification).
An appointment is created
Notifications are sent via email and/or text (these notifications go out regardless, when an appointment is created).
A student checks in for an appointment
Notifications are sent via ding (audible), pop up message (top right side of your screen), or email. The email notifications that are sent are advising appointment emails e.g. “A student has checked in for the appointment”.
An appointment is cancelled
Notifications are sent via email. Email notifications go out when the student appointment is cancelled on their calendar.
A student is removed from the queue
Notifications are sent via pop up message.
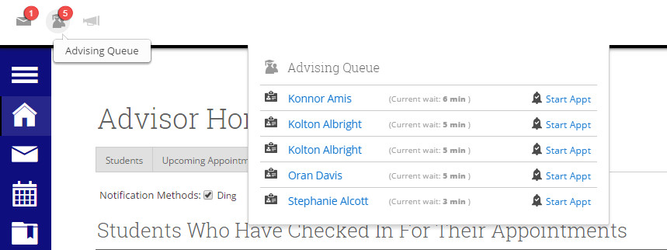
Notification Bar
The Notification Bar (top left of your screen) includes the Advising Queue icon and provides a shortcut to the Advising Queue. Notice the red icon with the number “5” in the example below; this icon will help you monitor the number of appointments that are currently in your queue. There is also a link next to a student’s name that will allow you to file a report for that student from the notification bar. Simply click “Start Appointment”. The Advising Queue title (next to the people icon) is also a link which will navigate you directly to your Advising Center when clicked.
Areas of Interest
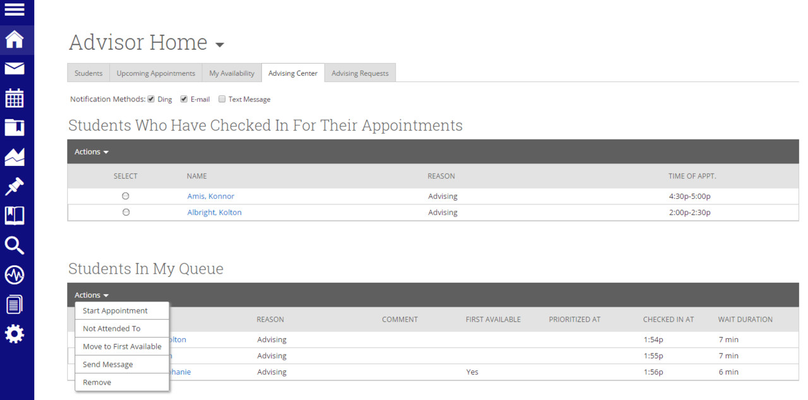
- Start Appointment: To file a report for a student in your queue and report upon that session simply click the Start Appointment button.
- Not Attended To: This option should only be used at the end of your day/shift to signify which students you were not able to meet with.
- Move to First Available: To move a student to the First Available queue, select the student and then click the button Move to First Available.
- Send Message: If you would like to send a message via email or text to a student, select the student and click Send Message.
- Remove: You should use this button when a student leaves without first meeting with an advisor. You should then “Remove” them from the list. This is different than the Not Attended To option in that the Not Attended To option the student actually waited to meet with an advisor but there was not enough time while the Remove option is for when the student leaves, on their own accord, without meeting with an advisor.
Students Who Have Checked in for Their Appointments. This grid shows any students who have checked in for an appointment and are waiting to see you. In other words, the student is in the waiting room ready to see you. When you are ready to meet with the student, click the circle beside the student and press the Start Appointment button. Doing this starts the appointment and brings up an advising report for you to fill out at the conclusion of the appointment.
Students In My Queue. This grid displays students who are waiting to see you, or the first available advisor. The list is sorted by placing the student who checked in first at the top. Along with this grid, you have given several options to manage the list of students.
Students in Queue for Other Advisors. This grid lists students who are on the waiting list for other advisors. This is perfect for when advisors want to help other advisors meet with their students. They can simply select one of the advisor’s students and click the Start Appointment button.